Showing posts with label wedding. Show all posts

February 14, 2019

Wedding Invitations: Tips & Tricks

In honour of Valentine's Day, I thought it would be fitting to kick off my wedding recap series on the blog. We've been married for 4 months as of yesterday and it's been so wonderful looking at all our photos and reliving the day. Funny how a whole year of planning can be over in such a flash!


As part of this series, I'm planning on sharing some details from our special day and things I learned along the way. First up, invitations!

SAVE THE DATES

For our wedding, sending out Save the Dates was necessary as we had a lot of guests who would have to travel. This way, they were given a lot of advance notice to block off the time in their calendars if they planned on coming. We opted to send ours through e-mail via Paperless Post, which I highly recommend because it was free (tip: the default option requires you to buy coins for fancy "envelopes" but I did away with "envelopes" altogether since these weren't our actual invitations thus making the cost zero).

In addition to alerting people to the date and location of our wedding, we also used the Save The Dates as a way of gathering our guests' mailing addresses. Paperless Post lets you track who's opened your card, which is helpful so you know who to follow up with. They have a lot of wedding invitation designs as well so you could do everything through them for free/cheap and in an eco-friendly way.

INVITATIONS

We had initially planned on using Minted for our wedding invitations because that's the platform we were using for our wedding website and online RSVPs. Side note: I tried a number of different options for our wedding website before I settled on Minted; ultimately I liked that we could manage our RSVPs in one spot, keep certain details private to guests only, and I was easily able to purchase a custom domain name through them.

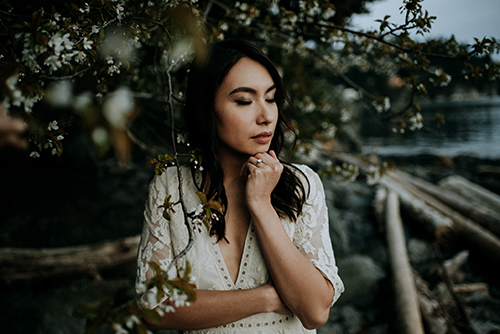
Our invitations, however, ended up being a last-minute design change once we got our engagement photos back. We both really loved this double exposure photo and thought it would look cool and more personal than the other invitation design which matched our website.


Since we were going to use our own photo, we decided to use Vistaprint instead. Not only is it considerably cheaper than Minted (tip: they have coupon codes all the time; I was able to get 60% off my order by tracking their deals), but we preferred this template for our "movie poster"-style invite. I'm not sharing a picture of the back here but it had some extra photos and details, including a link to our website for people to RSVP.

Vistaprint can be hit-or-miss sometimes but we were very happy with our experience. To avoid disappointment, I would recommend ordering their free wedding sample kit. It takes a while to arrive in the mail but you can see what the different paper stocks actually feel like. We ended up choosing the Linen which was a surprise since I had always thought I'd prefer matte.

The invitations also come with free envelopes but they're plain white and pretty thin. In order to elevate our wedding suite slightly, we opted to spend a little more money (but again, we got that discount!) and got custom envelopes with a grey/white marbled design.

To finish everything off, I ordered a custom address stamp from Etsy (there are tons of designs to choose from) and bought some calligraphy markers from Michael's. I have pretty nice handwriting so I hand-addressed everyone's invitations myself.

One last tip: when you're ordering invites, make sure you count properly! You don't need an invitation for every guest since a lot of people are couples or live in the same household. I ended up slightly over-ordering but I've found uses for the extras... mostly as bookmarks, haha. We also received this Kate Spade New York Take The Cake Double Invitation Frame as a wedding gift which has been a really nice way of displaying our invitation in our home.

January 14, 2019

My Honeymoon: Hawaii, Tahiti, and Bora Bora

Almost as much as we were anticipating our wedding, we were eagerly looking forward to our honeymoon as well. After all the stress of wedding planning for the past year or so, I knew I wanted to do a relaxing beach vacation as opposed to a city/exploring vacation. We also took the opportunity (it being our honeymoon and all) to justify going to Bora Bora which has been a dream destination of mine for years. Warning: this is going to be a pretty picture-heavy post!


Oahu, Hawaii

Since we knew that our end goal was to get to French Polynesia, we decided to break up the long travel by spending a week in Oahu first. Yes, I did go to Oahu twice in 2018 (as I mentioned in my Oahu vacation recap). However, there was so much we didn't get to see the first time around.


Since we didn't get to it on our prior trip, hiking up to the top of Diamond Head was a major priority.


We also did the Pink Pillbox Hike on the island's west side. This is my favourite hike I've done on Oahu thus far because there were no crowds (we probably saw about 6 people total) and the views were amazing.


We also rented a car and drove to the North Shore! I wish we had had more time to explore all the little shops in Haleiwa but we spent most of they day lounging at Waimea Bay instead. I did manage to get a photo with the iconic Colette Miller wings in front of Anahulu Shave Ice.


Hawaii, and Oahu in particular, have a very rich military history that my husband is really into. We did the USS Arizona Memorial and the USS Missouri on our last trip so this time we went to the Pacific Aviation Museum. In the Waikiki area, there is also a US Army Museum at Fort DeRussy which was incredibly interesting and also free.


Tahiti

After shopping and eating up a storm in Hawaii, we continued our journey with 48 hours in Tahiti. Although it's the largest and most populous, Tahiti is typically a stopover point for many people on their way to other islands in French Polynesia. However, it's beautiful in its own way with lots of lush vegetation and waterfalls.


We stayed in Papeete, which is the capital of French Polynesia. The Marché de Papeete is a must-visit for food and souvenirs.


I had also heard a lot about Les Roulottes (food trucks) that set up daily in downtown Papeete at Place Vaiete. These were interesting because they mostly served Chinese-style food but always with these giant plates of baguette. With the French influence over there, we got used to eating way more bread than we normally would!


Another thing I noticed all around the island were these beautiful, colourful murals that were basically everywhere.


Bora Bora

Then it was onto our final destination: Bora Bora. All of those photos you see of Bora Bora are what it looks like in real life... it's an absolutely magical place. The airport is located on its own little strip where there is no vehicle access. All of the transportation from the airport is by boat!


My whole purpose in going to Bora Bora was to stay in an infamous overwater bungalow (why travel so far to not do that?!) We stayed at the Sofitel Bora Bora Private Island, which is one of the smaller resorts but, as its name implies, it's located on its own private island. The grounds were perfectly manicured and the resort is adult-only which means quiet and very relaxing.


The water in Bora Bora was crystal clear and so warm. We spent each day doing some sort of water activity whether it was kayaking, snorkelling, or just floating around. What a serious luxury to have such access right from our bungalow.


Our resort offered a free boat shuttle to their sister resort on the main island. We took the opportunity to rent a scooter to tour around the main island "open air" style. There is only one road and it takes about an hour.


Bora Bora was the perfect end to a great honeymoon and I sincerely hope I get the opportunity to return. Maybe for a milestone anniversary? ;)

September 25, 2018

Wedding Hair & Makeup Trial: How To Prepare and What to Expect

There are lots of things to be excited about when you're planning a wedding but for a beauty blogger like me, coming up with my wedding look was one of my most anticipated. I'm obviously not a Kardashian so getting professional hair and makeup is a pretty rare occurrence, and it's always fun to see what you'll end up looking like when you hand over the reins to someone else. Since I just had my hair & makeup trial, I thought I'd share some of the things I learned!


1. Research, research, research

If you decide to go the professional route, a lot of research is involved in picking the right makeup artist/hair stylist for you. I knew that I wanted someone who could do both (two birds with one stone) and they had to be able to offer services for an entire bridal party plus my mom. I obtained a list of recommended HMUA from my wedding planner, did my own research for any additional ones I'd read good reviews about, and e-mailed them all for quotes. After comparing quotes, I narrowed down my choices and checked out their work on Instagram to see who might be a good fit. Some brides may want a more natural look or prefer someone who works with a particular ethnicity often (e.g. makeup for Asian features). I ended up choosing Jayna Marie Makeup + Hair because she's won lots of awards, had great reviews, and I liked her work.

2. Pinterest is your friend

Once I picked my wedding theme/decor and found my dress, I already had a pretty specific vision of how I wanted my hair and makeup to look. I very rarely wear my hair up so I knew I needed a style that would allow most/all of it to be down. I also love bold eye looks and neutral lips but wanted to play off of my dress and wedding accent colours in the makeup shades. My wedding theme is "west coast greenery" so I purchased a custom greenery comb from Oh! Dina Millinery and combed Pinterest for ideas on how to incorporate greenery into a hairstyle. I also decided that I wanted a gold based smokey eye and found some examples that I liked.

Sources: left // right

3. Bring everything to your trial

For my trial, I purposely wore white on top so I'd at least know how the hair and makeup looked against white clothing (when I got home I did change into something a little fancier so I could get the full effect). I also brought all my accessories with me: my greenery hair comb, the earrings I'm planning on wearing, and hair extensions to add volume to my thin hair.

4. Be flexible

After meeting Jayna and talking about my vision, I let her get to work. It's important to trust the professional! Jayna ended up changing the hairstyle slightly from what I originally asked for (everything to the side) because my hair isn't super long and it wouldn't have looked as good. She did show me how it would look that way and left it up to me to decide what I'll end up going with. She also really amped up the lashes (they are double layered and basically triple the length of my natural lashes) which was a pretty huge shock for me when I looked in the mirror for the first time... it's a lot of look but I kind of like it!

5. Check the wear time and take pictures

After you're all fancied up, it's important to test the wear time on your makeup. You want it to really last since your wedding day is long. A lot of people recommend having your trial on the day of your engagement shoot or for your bridal shower so you can really get your bang for your buck, which I think is a great idea. If you have your dress, try it on to get a preview of how you'll look on your wedding day or wear it to an alterations appointment. I didn't really have that luxury due to timing but I did make note of how shiny I got, anything I want to change, and will bring that feedback to Jayna. I also took pictures when I got home to see how the makeup looked outside of Jayna's fancy studio lights.


It's so crazy to think that my wedding is just a few weeks away... I hope this post was helpful for any other brides-to-be. Stay tuned for the final look!

September 1, 2018

My Vegas Bachelorette

Yikes, somehow I've let the entire summer pass with barely a blog post in sight... it has just been SO crazy this year planning our upcoming wedding. I do have a ton of things I want to write about so hopefully will be able to get a few reviews out soon. In the mean time, I thought I'd share a recap of my recent bachelorette trip to Las Vegas!


The trip was planned by my MOH and one of my bridesmaids and was a total surprise until the day of. I was told what days to book off work and given a packing list but the ultimate destination and the activities we were doing were totally unknown to me. I'm the type of person who reads movie spoilers and flips to the back of the book to find out the ending before I've even started reading so the fact that I was able to refrain from shaking the info out of my friends was quite a feat. Side note: I'm keeping my friends off the blog for their privacy so the pictures in this post make it look like I was in Vegas by myself... I promise I wasn't alone!

My MOH got me a super cute Hello Kitty hat to wear (see below) -- when in doubt get me anything Hello Kitty because I am obsessed with her, haha. I was also excited to use my new Away Luggage, which ended up being the perfect companion for this 3-4 day trip (it's the Carry-On in white).


When I arrived at the airport, my friends were already there and on their phones they were playing a Backstreet Boys song... because we were going to the BSB concert that night!! Total dream come true. I had the best time singing along to all their classics and reliving my teenage years.


The next day we went to a pool party which is something I've always wanted to do in Vegas. It was super fun chilling at the pool, listening to the DJ, stuffing our faces with appies, and drinking cocktails. It also gave me the perfect opportunity to wear this "BRIDE" bikini that I've had for months.


Later that night we headed to the Strip for dinner at the Gordon Ramsay Pub & Grill located in Caesar's Palace before we hit the club. I'm way too old to be clubbing but the clubs in Vegas are unlike anything back home (thousands of people, multiple rooms) that it really was something we all wanted to check out. We went to Hakkasan where Zedd was playing.


We didn't get to bed until 3 a.m. so a delicious brunch was in order the next morning. We had made reservations at Mon Ami Gabi, which is in the Paris Hotel. Afterwards, we decided to check out some of the other hotels on the Strip including The Venetian with its infamous indoor canal and gondola rides.


We ended off our last night in Vegas at our hotel, the SLS Las Vegas. It is a super cute boutique hotel at the north end of the Strip which meant it was much quieter and nicer to come home to. It also has its own monorail station so it's convenient to get around. If you are heading to Vegas, I would definitely recommend it!

Dinner that night was our favourite of the trip: Mediterranean tapas at Cleo. The food was sooooo good. We also hit the casino for a bit of "gambling" (in quotes because none of us are high rollers and won 60 cents only to lose it again).


It was tough heading back to Vancouver after such an amazing weekend with my friends. It's a lot rarer to get to go on girl trips like this now that we're all older and have so-called "adult responsibilities". I seriously cannot thank them enough for treating me to such a great time!

May 3, 2018

Engagement Shoot Portraits

With our wedding date slowly creeping up, my fiancé and I had our engagement shoot with our amazing photographer, Sara Rogers, about a week ago. We picked Whytecliff Park in West Vancouver as the location since we often spend time there if we miss the ferry when we are heading up to the cabin in the summer.

Being the over-prepared type of person that I am, I actually had my outfit ready for months in advance. I think I ordered this dress last Fall in anticipation for our shoot and I've got to say, it was totally worth it... the photos turned out better than we could have imagined and we can't wait to have some printed and framed for our home. Sara also took a few portrait shots of me which means I can now share the look with you!

Dress: Love Verity / Boots: Sam Edelman (here)

All content and photography © alison*elle. Design By The Sunday Studio.